
 / 2
/ 2
 The phrase Home Theater System is rather a generic term in the broad scope of home theater equipment, and how to build a home theater system is even more broad. Home Theater systems comes in a wide variety of flavors, and one design rarely fits the needs of another, so building a home theater system require a lot of planning and knowledge. In the most basic form, a Home Theater System is a simple 5.1 surround sound system linked to an A/V receiver and a projection screen or HDTV. This type of home theater system can be easily picked up at one of the box retailers and installed with very little skill.
In today's technology driven world with most electronic devices being labeled as "Smart," and being DLNA and UPnP compliant, Home Theater systems now expand in much greater detail. No longer does the average home owner want the basic home theater system, as that offers very little interaction with other devices and limits those finer qualities such as networking all your devices for control, incorporating automation functions, etc .
Today's Home Theater consumer wants to sit in that comfy theater seat with a handheld device such as an iPad and control not only the entertainment in front of them, but rather select music or videos from shared sources such as media pc's, gaming consoles, and other storage devices, and further display them in various locations. Being able to pull up live security cameras in any zone and send them to a select zone has been a big request for us as well.
The vast majority of our clients want a specific home theater system, but with all the products available on the market, it's a mind blowing experience. The worst part for a consumer is trying to find home theater system products that play nice with one another (compatibility), and are expandable to meet new technology or further expansion within the home theater system. Enter network A/V receivers, the newest features in home theater system equipment designed to mesh with the home network and offer control to a degree. While these features are certainly an added value,there are also limitation within the A/V receiver when used as the source controller, and a few of the biggest issues are severe latency when switching sources, poorly designed GUI's, inherent problems with 2 way communication, driver issues, etc. For these reasons to name but a few, a home theater system should include a controller and possible matrix switching.
If you are anything like us, and per the many requests we get, we know you are, we love technology and the convenience it offers. I'm not interested in having 10 remotes, or an all in one remote that simply just powers components on. Oh No, we want control of everything, or at least the option to do so later on with what we have.
Below is our Home Theater System that enables you to accomplish nearly anything you want while controlling it from one location, or multiple locations.
1) Home Theater System computer. We use a custom built rack mounted 8 core 4+GHz based pc with all the goodies and plenty of storage. The PC runs server software for streaming audio and video content over the network. The home theater pc also acts as a gaming console and full use computer. the option of use are are unlimited, from recording TV to using it as a NVR security control system. In addition to the pc, we include a rackmounted touchscreen for complete acess to the pc when at the rack.
2) A/V Receiver. We use an HDBaseT network receiver to extend it's capabilities into other areas over a single cat6 cable. Not only can you have your full surround sound in your home theater, but run another in a serrate room, or mix it up with 4 zones, a main zone with full surround, 2 audio zones and a fourth zone with HD video, all at the same time.
3) Media & Control Components. These are source components such as game consoles, NVR, DVR, settop boxes, Blu Ray, DVD (DVD and Blu Ray can be part of the pc), automation, etc.
4) Network POE Switch. Every home network should have a POE switch. We use the 24 port Signamax POE switch on most of our installs. The switch runs the network and also our security IP camera systems. It's a valuable component for controlling network traffic efficiently, among many other aspects.
5) Home Theater Master Controller. This is the piece that pulls it all together. The Key Digital MC 1000 (review coming soon) is the IOS backbone with an amazing AP to fully control the system and set sequences for truly pure home theater automation. Control audio, video, HVAC, shades, security, lighting, other much more. This control will need to be programmed to your specific needs, and requires training, but NDC will take care of the programming during the installation.
/ 4
|
Yeti ICe Chest
Canyon Ice Chest
Engel Ice Chest
K2 Ice Chest
Moeller Ice Chest
Pelican Ice Chest
Grizzly Ice Chest
Orca Ice Chest
|
So what's the best ice chest you can buy? As of late, there's been an explosion in the ice chest market, and one that not many people understand. What more could be done to an ice chest from those we are so accustomed to? With the hefty price tags that these new ice chests demand, I thought this would make for a good article, as I too have been in the market for a new ice chest for both marine and hunting/camping use. In addition, from my research, I've decided to jump into this new style ice chest and try it for myself, in which a full review will soon follow this article.
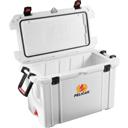
Pelican Ice Chest - ProGear 95 Qt Elite (Not much details available on this product either)
Grizzly Ice Chest - 150 Qt ( Not much detail available on company site, or other sites)
Orca Ice Chest - 140 Qt ( Not much detail available on company site, or other sites) |

.jpg)
.jpg)
.jpg)
.png)
.jpg)
.jpg)
.jpg)
/ 3
Trail camera shopping for the best trail camera available may seem rather easy, but upon closer inspection you'll start to see how similar these trail cameras are on paper, thus confusing the novice buyer. Even the product category isn't clear, as some call them a trail camera, and others a game camera or wild game camera, and it even goes deeper to include Deer Cameras and other wild game animals. Despite the various camera names, the most widely used term is trail camera.
So, given the close similarity on paper, how does one choose the right trail camera for their needs? The first aspect is to compare the paper data on each trail camera to see which cameras have the best features and aspects to fit your needs. You may not know what your needs really are, but I'm sure image and video quality are you main concern.
Trail Camera Image Quality (Megapixel): This is where it may get confusing. Not only in trail cameras, but encompassing the entire camera industry is a misconception of the word megapixel, with more meaning a better image, or does it? This seems to be embedded in most minds today, but in reality it's a bit too hyped. In general, printing a 14x11 picture with crisp quality will need 5 megapixels, an 8x10 will need 3, a 4x6 will need 2, and just viewing your trail camera images on a computer will look very crisp at 1. I've tested 12, 8, and 5 cameras printed on a 12x17 poster with the same dpi and they were all identical from the human eye. I've printed a 30 inch wide poster from a 6MP camera and it looked as if it were shot from a $6000 camera! Despite the math behind it, the end results were the same. Megapixels are a general guide to the size of the photo as pixels within, and is best used to determine how large the photo can be printed and maintain quality. In short, the higher the number the larger the print, but it doesn't truly tell you anything about the quality of the camera's lens and sensor, or file compression that can drastically lower the image quality. A 5MP camera with a high quality lens can easily outperform a much higher 8-10MP camera with an average or sub-par lens.
Interpolated. Say what? I've seen specs on some of these trail cameras that use this wording, which simply means it's an estimation!
Trail Camera Video Quality: Naturally, some people think that their 8MP trail camera is going to be an 8MP video cameras as well, but this is certainly not the case. Still images and video are two separate animals. The factors that ensure good quality video are the lens, and the size and number of the CCD's. Quality relates to having bigger CCD's and a good lens, which produces better color and image as the size and quality increases. Half (1/2) inch CCD's were the norm a few years back, then they went to 1/3, and now 1/4 seems to be the most common used, which enables the use of a smaller and cheaper lens, thus cheaper to produce. However, to offset this loss in quality, a micro-lens is applied to each pixel, thus making a 1/4 lens comparable to a 1/3 lens. Lastly. to capture true 1080P HD video you'll need only 2MP, and for 720P, you'll need 1MP. A VGA resolution is 640x480, which is not a MP camera. A frame rate of 30 (fps) is ideal to ensure smooth video.
Reviews coming soon...
/ 3
Since early 2009, the marine industry has seen a shift in lighting from fluorescent and incandescent marine lighting to halogen, Xenon HID , Metal Halide and Marine LED lights. This shift in marine lighting came abruptly and continues to grow rapidly. Marine LED lights makes perfect sense in any marine lighting situation, as they "outshine" other marine lighting options in virtually every aspect, from durabilty and much lower power consumption, to extreme lower temperatures and cleaner output. Are there brighter lights available? Yes, but as you'll learn throughout this review, LEDs can produce equals to a point and with all the benefits, you'll want to investigate LED marine lights before making a purchase of another type. In the marine lighting industry, the three primary areas of interest are based on a combination of longevity, low heat and minimal power consumption. This is something that the other marine lights mentioned above simply can not do! With this in mind, manufacturers have been designing marine LED lights with our needs in mind, and building some very high quality lights.
I remember not too long ago when we all had halogen lights that really lit up the water, but many boaters were simply terrified to run them for more than a few minutes out of the fear of draining the battery. I've turned the key a few times on my night trips only to hear that dreaded slow turn of the engine starter. I've also nearly caught a few items on fire from being to close to the halogen lights. With halogen marine lights, about 90% of the energy used is converted to heat! That's simply a major waste of light, energy, and the life of the bulb.
Then we had the deck lighting made up of low wattage incandescent (10 watt) lights that always produced a yellowish glow. It seemed that the moon made for a better light than running four 10 watt lights. We all wanted something better, something brighter, something that wouldn't kill our batteries, but we had no options. Then came those cheap led lights that lasted but a few trips and just fizzled out. Wal Mart seemed to be one of the first places to jump in on the LED bandwagon back in the the late 90's, as they started selling those LED bars for helm lighting. I saw many boats sporting these LED lights, including myself, but within a few months my LED light ended up in the recycle can! These were simply junk. I can't believe it took another nine or so years to get a quality LED light on the market. The reason was and still is somewhat, that lumens cost money in the LED light world. When lumens start costing pennies we will see every boat sporting LED's. Right now, quality marine LED lights range from .08 to .20 cents per lumen, but with the quality and life of the LED's, they are well worth the extra expense.
Imagine if we could have a super bight 10 watt LED light that ran at 3/4 of an amp and out performed in all areas a 40 watt halogen guzzling 3 amps? Imagine running 4 of these 10 watt LEDs at 3 amps versus 4 of the 40 watt halogen lights at 12 amps! You could run your lights with no fear of a dead battery.
Below, I will compare LED marine lights vs Halogen marine lights vs Incandescent marine lights. In addition, I will give you a real world review of a few different marine LED lights (spot, spreader, and underwater transom lights).
Fluorescent Marine Lights -
Fluorescent lamps are gas charged mercury lamps that use use an electrical charge to excite the mercury vapor within. Once energized, the mercury produces short-wave ultraviolet, which reacts with the phosphor and produces visible light. This type of light is more efficient than incandescent, but the lamp itself it more expensive. Fluorscent lamps depend on resistance voltage, and to operate these lamps a ballast is needed. If no ballast were used, the resistance across the lamp would drop, thus allowing more current to flow and instant damage to the lamp. Fluorscent lights in the marine industry are mostly used as cabin type lighting, and persoanlly, I see no use for them anywhere else, especially in open air enviornments. The energy to run a DC driven fluorescent light of this type is too high being that the ballast usually uses as much energy as the lamp itself, thus doubling the energy requirments. Now, there are battery operated lamps on the market that have low power consumption requirments in the .03 to 1 amp rating, but the light from such a lamp certainly can not match that of a quality LED light. In addition, any low current fluorescent DC lamp woth having will be the more expensive. When you add up all the aspects, and toss in the fact that flourescents don't take well to vibration, well I'm clearly not a fan and would not recommend such a lamp for my boat when clearly LED outshines, outlasts, uses less energy, and is more reliable.
Incandescent Marine Lights- Details Coming Soon
Halogen Marine Lights- Details Coming Soon
Xenon HID Marine Lights- Details Coming Soon
Metal Halide Marine Lights- Details Coming Soon
LED Marine Lights -
What are LEDs? LED stands for Light Emitting Diode, a simple semiconductor that produces light when a current flows through it. They come in many colors, shapes, and sizes and have been around for many years. However, as mentioned above, they have just recently hit the market in high-powered versions. Compared to conventional underwater boat lighting such as those mentioned above (halogen, metal halide, xenon), LEDs use less power and produce more light, pound for pound out shinning all the others. LEDs far exceed the lamp lives of conventional lights and in the case of underwater lighte, they install without drilling large diameter holes through your hull.
Quality marine LED lights have a rated life expectancy of 50,000 plus hours, which is not the end of the lamps but the point at which the LED produces 70% of the original lumens when new. This is still a very bright light at 70%. As a measure, at 24 hours per day of continuous use, an LED can deliver useful light for six years or longer! Imagine how long that LED will last on your boat! LEDs do not use filaments or other fragile components used by halogens, metal halides, and xenon based marine lights. Because of this, they have virtually nothing that can fail when properly designed for their environment.
What kills the life of LEDs is excessive high current operation and overheating, which has been overcome when you use a high quality design. Quality LED marine lights come designed with a very effecient heat sink system to rapidly remove heat from the LED components. Quality LEDs also are engineered with smart power supply drivers to prevent over current driving of the LED components through a constant current.
How do I compare the brightness of one LED to another?
Well, that seems to be the million dollar question. There are some marine LED light manufacturers that put out specs on their lights that simply aren't true, and these are pretty easy to cipher by looking at the price, internal components, and the exterior casing, and then comparing to others on the market. In terms of lumens and Lux output, you have to be very insightful and compare apples to apples.
First, most of us want to immediately shout out wattage! In the case of LEDs, you'll need to retrain your way of thinking. The wattage value is the amount of power the LED, or regular light bulb draws from the electricity supply, which is taken from the formula of volts x Amps= wattage. With conventional light bulbs, a percentage of that power is converted into light while a vast majority into heat. In an ordinary incandescent bulb, most of the wattage is dissipated as heat, and a smaller fraction as light. In a fluorescent or energy-saving bulb, a much greater proportion of the power consumed is converted to light. With LEDs, even a greater portion is converted to light! This is why you'll see LEDs with a much lower wattage rating, yet still produce a very high output of light. In short, forget about wattage as a comparison tool, but consider it as a measure when comparing LED to LED.
Secondly, a lumen is the measure of the total light output from the LED measured in all directions. You can not compare LEDs based on this because thought it may produce xxx amount of lumens, those lumens may not all be emitted from the unit, as 30% can be lost in the light housing from poor deign. The design of the unit and lens can reduce the amount of light output drastically. In example, you could have a 700 lumen light with a great lens and housing deign outproduce a 1200 lumen LED with a poor lens and housing design. Shading and filtering of the light also play a role here, which is why lumens are measured from the entire system and not the LED itself. Keep in mind that the LED manufacturer also has a lumens measurement for their LED tested with no 3rd party housing, which the 3rd party can easily state as their own after the LED is placed into their housing. Reputable sellers of marine LED lights do not base lumen measurements on the test results of their LED source suppliers, but instead use an independent third-party testing lab to measure and validate the output of their LEDs once placed inside their housing. So, while the lumen is not a good measuring tool, it is certainly a number to use as a starting point when looking for and comparing LED to LED, but don't let a few hundred lumen discourage you from a product.
Thirdly, we have Lux, which is a measure of light produced on a target area. A Lux measurement indicates how well the surface area of an area is illuminated at some distance away from the source. It's basically the intensity of the light. This is where you will start to see the real truth in LED light output, but you will also get some misguided information here as well, so look deeper and compare. In example, you compare a light with an output of 100 lux to another at 150 lux and instantly you like the 150 lux number. This is where you need to find out the distance from which the lux was measured. If that 150 lux was measured at say 15 feet, and the 100 lux from 25 feet, then you know the 100 lux will only increase as it moves closer to the target, and in this case would most certainly be as bright if not brighter. However, this number can still throw you off because you have to take into account the spread of the light beam, as a 20 degree beam will have more lux than a 40 degree beam, as it is condensed to a smaller area.
Objects are illuminated and measured in LUX as shown below:
- Full Daylight approx 10,000 LUX (this would be 10,000 lumens each and every square meter!)
- Cloudy day approx 1,000 LUX
- A lighted parking lot at night approx 10 LUX (average)
- A full moon approx 0.1 LUX
STAY TUNED...MORE TO COME
/ 3
Electric Trim Tabs: Electromechanical Trim Tabs VS Hydraulic Trim Tabs
Electromechanical trim tabs vs Hydraulic Trim tabs. Google this and you'll find a ton of articles regarding trim tabs of both nature. How does one make an intelligent decision between electric trim tabs and hydraulic trim tabs when it seems that there are way too many opinions, comments, and contradictions, and the opposition between them will make your head spin.
It does appear that the hydraulic biased side has an armor piercing bullet when it comes to firepower, as we all know electric and water certainly do not go together, and the thought of such somewhat persuades the masses. But, what about the hydraulic pump that has to be powered by DC voltage? Do you want this oily mess sitting beneath your center console dripping transmission fluid on your deck? Perhaps you want to mount the pump back in the transom area where it's out of the way, you know, back there where it's nice and moist from the open access to the bilge? Well, that may very well be the downfall of the hydraulic pump, as it too must remain dry or the connections and components that drive things such as auto tab retractors, and the port and starboard actuator contacts will corrode and become inoperable. Did the bullet penetrate, or just bounce off and cause more confusion?
The one common element that takes the brunt of the beating is the o-ring used in the electromechanical trim tab to keep the water out. Well, I've heard that O-ring damage also occurs on the hydraulic trim tabs due to barnacles growing on the ram, ultimately causing the seal to leak fluid. This certainly can't be good for the marine environment! Perhaps the pushing force is greater on the electromechanical tabs making them more stable at higher speeds, or reaction time is faster on hydraulic tabs, but retraction and extension times are faster with electric! Wow! We can't forget about Hydraulic trim tabs having feedback sensor problems and electric tabs getting stuck in full down position. Then you have excessive lag time from electric and precision from hydraulic, longer warranties for hydraulic tabs, faster and easier installation times for electric tabs, numerous durability and replacement issues, and the list goes on.
I've read and heard many comments from boaters that have had no issues with electromechanical trim tabs, and the same from the opposing hydraulic side. Some boat manufacturers supply their boats with electric trim tabs while others supply their boats with hydraulic trim tabs. In my opinion, if either or were a bad choice then you'd see a lot less trim tabs on boats as they simply wouldn't be worth spending money on, unless you just want to look cool, at which point you couldn't go wrong with either type because they all look good.
I've only owned hydraulic trim tabs, some by choice but some simply because the particular boats that I've purchased already had them on it. Had I been given the choice after further research, well, I'd probably be still debating due to the confusion and miss out on owning any trim system. I've put hydraulic tabs to the test and can tell you that they too are not without flaws by any means. In fact, throw in too much technology and not enough attention to smaller things like moisture intrusion and you'll have problems as I surely found out. Feel free to read my hydraulic trim tab review of a very popular brand.
There are a few other types of trim tabs available out there as well, but for the purpose of this article I'm not going to confuse you any more than you may already be. Despite all of the arguments amongst the two sides, I am going to take my first venture into the world of electromechanical trim tabs! If what the hydraulic quorum says is true, then wish me luck! If what the electromechanical quorum says is true, then you'll see me trimmed out and rippin!
Seeing as I decided to go with the Uflex Hydraulic SilverSteer Steering system because of their engineering technology and attention to quality parts in the steering system, I also feel like this quality will bleed over into the tabs as well, so I'm getting my hull wet with their trim tab system. I will be installing this trim tab system along with the steering system as part of "Project Osprey," our boat rebuilding project currently taking place. I will give a fully detailed review complete with an installation video and pics, as well as a full article detailing as much as I possibly can, and a longevity report to keep you updated.